Sunday 22 November 2015

Negative Space Nail Art Tutorial

Negative space nail art is a technique I love but i've never really tried, so I thought I would give it a go and created a subtle striped design.

Negative Space Nail Art Tutorial

Negative Space Nail Art

What will you need?
All you will need for this tutorial is 3 nail varnish shades. I went for two nude polishes and a bright fuchsia to add a pop of colour. You will also need some striping tape and a dotting tool.

Step-By-Step Tutorial:


Step 1: To begin take some striping tape and place onto a naked nail.

Step 2: Next, fill in the gaps between the tape with the 3 polishes of your choice.

Step 3: Remove the tape to reveal your negative space design.

Step 4: After everything has had time to dry, go in with a top coat to seal in your nail art.

And there you have your subtle, striped, negative space nail art.

Negative Space Nails

Happy Nail Art-ing!
Sam x

Party Ready Nail Art Tutorial

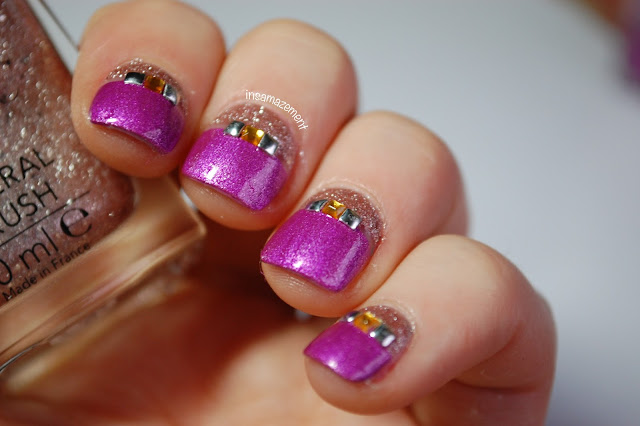
It is coming up to that time of year, where christmas party celebrations are just around the corner. Nothing says party like a bit of glitz and glam, so grab your glitter polishes and nail gems to get your nails party ready!

Christmas Party Nail Art

Party Nail Art

What will you need?
All you will need to create this nail art look yourself is a glitter polish, a fuchsia polish, some striping tape and a selection of nail art gems.

Step-By-Step Tutorial:

stripe nail art tutorial

Step 1: Begin by placing a piece of striping tape just above the centre of each nail.

Step 2: Take the two polishes onto the dotting tool and place either side of the nail.

Step 3: Remove the striping tape.

Step 4: Paint a layer of top coat onto each nail and place 3 gems along the stripe between the 2 polishes.

And there you have 10 nails ready to party!


What party plans do you have for the christmas season?

Sam x